障害児育児において、おむつ替えは毎日のこと。
しかも我が家は二人分です ( ゚Д゚)
慣れてはいるものの、意思疎通が難しい子の場合、ちょっとしたことで苦戦することもあります。
さすがのプロ!ヘルパーさんに教わったおむつ替えのコツ
実際に在宅支援で来てくれているヘルパーさんから教わった、
「お腹まわりにゆとりをもたせつつ、横漏れしにくい紙おむつ替えの方法」をご紹介します。
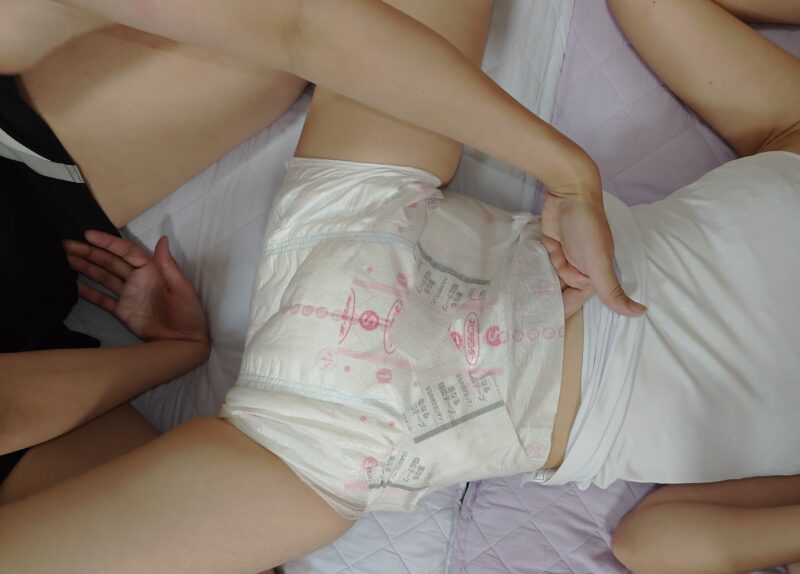
📸 実際のおむつの貼り方(写真)
下の写真は、我が家で使っている紙おむつを装着した様子です。
ヘルパーさんに教わった「下のテープを斜め上45度で止める」工夫がポイントです。

💡 手順のポイント
- 写真にあるように、まずは下のテープを斜め上45度になるように固定。
- 次に、上のテープを斜め下45度になるように固定します。
- さらに、サイドギャザーに指を入れてやさしく引っ張ることで、大ももにしっかりフィットし、不快感や漏れを防ぐことができます。
- 上のテープを下向きに貼ることで、お腹まわりにゆとりができて圧迫感も軽減されます。
同じように悩むご家庭に伝えたいこと
「ちゃんとできなくても大丈夫」「コツを少しずつ知っていけばいい」
…そんな気持ちで、我が家のやり方を共有しています。
日々の介護が少しでもラクになればうれしいです。
‐はな
🇬🇧 English Translation
Introduction|Diaper Changing—Familiar Yet Full of Challenges
In raising children with disabilities, diaper changes are a daily routine.
And in our household, we have two children ( ゚Д゚)
Even though we’re used to it, it can still be challenging when communication is difficult.
Pro Tips from a Professional! Diapering Technique Taught by Our Caregiver
We’d like to share a method we learned from a home caregiver:
“A way to give the tummy some room while preventing side leaks.”
📸 How to Put on the Diaper (Photo)
The photo below shows how we apply a tape-type diaper.
A key tip: Fasten the bottom tape at a 45-degree upward angle. <div style=”text-align: center; margin: 20px 0;”> <img src=”https://shougaisha.com/wp-content/uploads/2025/07/P_20250727_200157-1.jpg” alt=”How to put on the diaper” style=”max-width:100%; height:auto; border:1px solid #ccc; padding:5px; border-radius:8px;”> </div>
💡 Key Points
- First, fasten the bottom tape at a 45-degree upward angle.
- Then fasten the top tape downward at a 45-degree angle.
- Gently pull out the side gathers to make sure the diaper fits around the thighs.
- Leave a little room around the stomach by applying the top tape downward—this reduces tightness.
A Message for Families Facing Similar Struggles
You don’t have to be perfect.
If you can learn a little trick at a time, that’s enough.
I hope sharing our method can ease the daily routine for other families, too.
‐HANA


